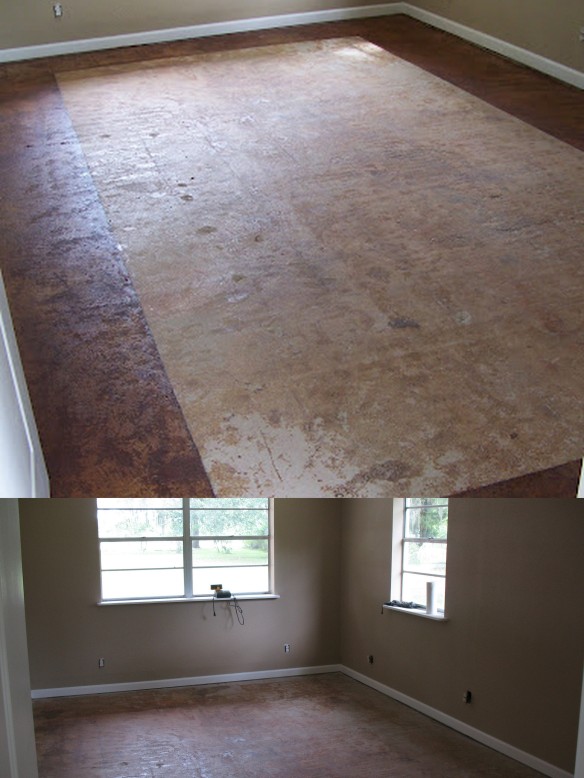
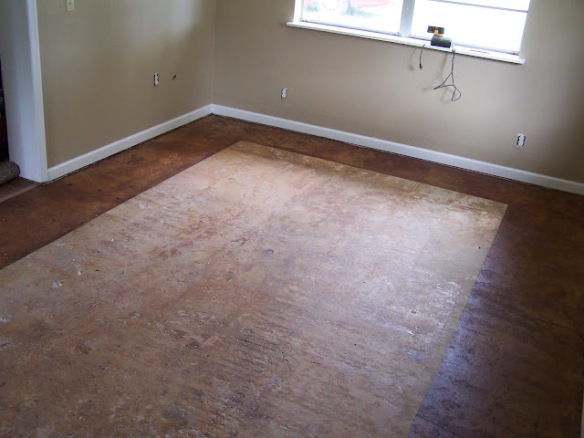
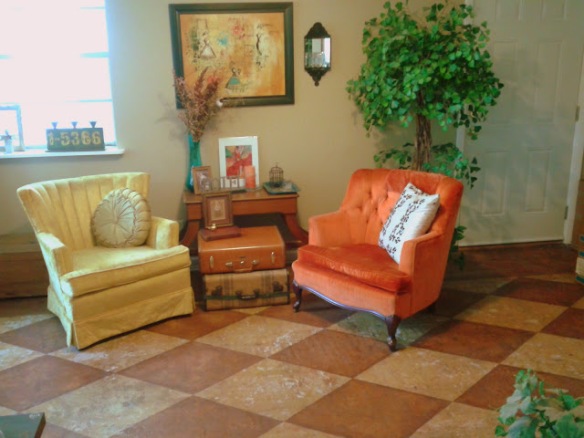
Staining concrete floors is a breeze, and a great way to create a big impact with a little dent in your wallet. We recently remodeled our home, and staining the floor of my vintage room, was a big project but TOTALLY worth it. When we removed the old flooring, and I could see that the concrete underneath was a beautifully worn out, old, golden concrete and I loved it! Instead of covering with another flooring, I decided to leave that and work with it to keep the aged, worn look and just add a stain to the existing concrete floor. Staining a concrete is not too difficult, and can be a great DIY project to try!
After researching the basic ‘how to’s’ online, I went to Home Depot and Lowe’s to check out the staining materials. They have kits there with everything you need to create a beautifully stained floor. The staff at Home Depot was quite knowledgeable about the process. I bought one of the kits for about $100 and headed home to create my masterpiece.
Realizing the kit was more than I needed, I decided to return it the next day, and just buy the stain, sealer(much cheaper this way), a few brushes, and drop cloths, and wing it.
What I am trying to say is…don’t be afraid of it. It was easy peasy. You can buy the kit, and follow the directions, uses the sprayer and stain the floors(the kit even comes with a CD to teach you), or you can clean your floors, draw a pattern, and hand brush it. Either way, is the right way. Once I finished I rolled on 3 coats of varnish and ta-daaaaa…it came out gorgeous!!
This is basically how I did it. First you will want to clean your floor, to remove any residue that might resist the stain, like glue, sealed paint, oil, things like that. If the stain can’t ‘stain’, it won’t work. The concrete has to absorb it, so remove anything that might interfere with that. The floor should be completely clean. However, if there are previous stains, and marks it may enhance the look you are trying to create. For me, I loved the grunge of the old flooring left behind…so I left it.
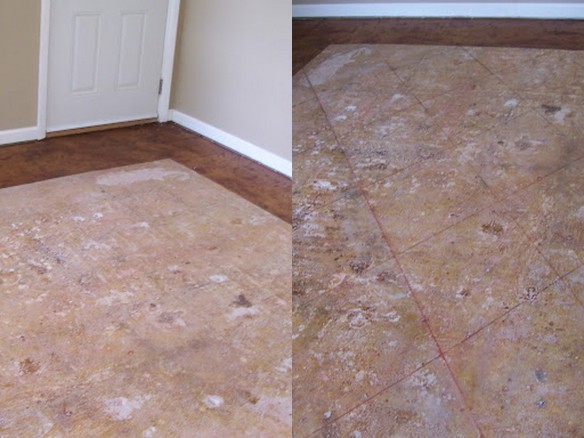
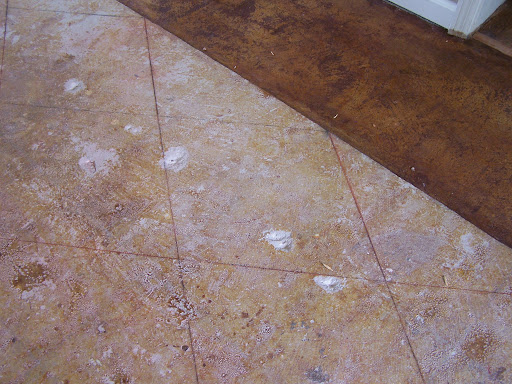
Once your floor is clean, you will want to mark out your pattern. We used a chalk line to make our grid marks for the harlequin pattern. If you’re using a stencil, follow their directions. Notice…this is NOT the final design…we had to erase and re-snap the lines a few times until I felt it was right…and that’s ok.
After looking at these lines on the floor I decided I wanted more of a ‘rug’ look, so I opted to add a border. The border eliminated the need to get the lines on the edge perfect in an imperfect room. I created a perfect box in the center of the room and just stained the floor all the way to the wall. It helped to hide the fact that the room’s imperfect lines tremendously!! Many rooms are not perfectly square, so by creating my own rectangle from the center out, made it easy to get the harlequin lines perfect and not worry about the outer edges.
Then it was time to put in the pattern. We snapped the lines with chalk first, then I went over them with a contractors pencil. The pencil graphite actually mixed with the stain and added a cool charcoal looking outline to the stain. If you are going for a more clean look, you may want to use white chalk instead.
Then it was basically like coloring in a coloring book. I painted the stain inside my pattern, let it dry, and then sealed it. It was time consuming, but overall, not too hard. It came out beautifully, and is VERY easy to maintain. I love it, and would do it again.
I love to entertain in this room, and have friends. I sit in my vintage room every morning to drink my coffee, and plan my day. It’s my favorite room in the house.


